Cement Test : Field Vs Lab – Learn the key differences between field and lab tests of cement. Field tests provide quick on-site checks, while lab tests offer detailed quality analysis. This guide explores various cement testing methods as per IS codes, their importance, and how they ensure cement quality in construction projects.
Table of Contents
Introduction
Cement is one of the most crucial materials in the construction industry. Ensuring its quality before use is essential to maintain structural strength and durability. To check the quality of cement, two types of tests are commonly performed: field tests and laboratory tests.
Field tests are quick, simple methods conducted on-site to get a rough idea of the cement’s quality. These include checking the color, texture, smell, and feel of cement, as well as basic water reaction tests. Although field tests provide an instant assessment, they do not offer precise measurements.
On the other hand, laboratory tests are conducted under controlled conditions using specialized equipment to determine the chemical and physical properties of cement. These tests, such as fineness, consistency, setting time, compressive strength, and soundness tests, follow specific guidelines set by Indian Standard (IS) codes. Lab tests provide detailed and reliable data, ensuring that the cement meets safety and quality standards.
Both testing methods play a vital role in construction. While field tests help in the initial selection of cement, laboratory tests confirm its suitability for structural applications. This blog will explore these testing techniques in detail, comparing their importance, advantages, and limitations. By understanding these tests, engineers and builders can ensure they use high-quality cement, ultimately leading to stronger and more durable structures.
1. What is Cement?
Cement is a fine, grey powder that acts as a binding material when mixed with water. It is mainly used in construction to form concrete and mortar. Cement hardens when it reacts with water, a process called hydration.
2. Types of Cement (As per IS Codes)
Cement is classified into various types based on its properties and applications. The main types include:
1. Ordinary Portland Cement (OPC) – The most commonly used cement for general construction. Available in 33, 43, and 53 grades.
2. Portland Pozzolana Cement (PPC) – Contains fly ash, enhances durability, and is used for dams, bridges, and marine structures.
3. Rapid Hardening Cement – Gains strength faster than OPC, used for quick repairs and road pavements.
4. Sulphate-Resistant Cement – Used in sewage treatment plants and coastal structures to resist sulfate attack.
5. Low Heat Cement – Generates less heat during hydration, ideal for mass concrete structures like dams.
6. White Cement – Has a high aesthetic appeal, used in tile grouts, flooring, and decorative works.
7. Blast Furnace Slag Cement – Made by mixing OPC with blast furnace slag, offering high durability in coastal areas.
8. Hydrophobic Cement – Used in waterproofing applications, repels water during storage.
9. Colored Cement – Used for aesthetic and architectural applications by adding pigments.
10. Expansive Cement – Used in grouting and pre-stressed concrete where slight expansion is required.
IS Codes for Cement
Cement is regulated under various Indian Standard (IS) Codes:
IS 269: OPC Cement
IS 1489: PPC Cement
IS 455: Portland Slag Cement
IS 8043: Sulphate Resistant Cement
IS 12330: Hydrophobic Cement
IS 8042: White Cement
3. Manufacturing Process of Cement
Cement is manufactured using two processes:
A. Wet Process (Old method, rarely used today)
B. Dry Process (Modern method, widely used)
A. Wet Process (Older Method – Rarely Used Today)
In this process, limestone and clay are mixed with water to form a slurry before heating. The steps include:
1. Crushing & Grinding – Limestone and clay are crushed into a fine powder.
2. Mixing with Water – The ground materials are mixed with water to form a slurry.
3. Blending & Homogenization – The slurry is stored in mixing tanks for uniform composition.
4. Heating in Rotary Kiln – The slurry is heated at 1400-1500°C to form clinker.
5. Cooling & Grinding – The clinker is cooled and mixed with gypsum for final grinding.
6. Packaging & Distribution – The finished cement is packed into bags for use.
B. Dry Process (Modern & Widely Used)
The dry process is more efficient as raw materials are mixed without adding water. The steps include:
1. Crushing & Grinding – Limestone and clay are crushed separately into fine powder.
2. Mixing & Blending – The dry powders are mixed in silos.
3. Preheating & Calcination – The mixture is preheated to 1000°C before entering the rotary kiln.
4. Heating in Rotary Kiln – Heated at 1400-1500°C to form clinker.
5. Cooling the Clinker – The hot clinker is cooled rapidly using air.
6. Final Grinding – Clinker is ground with gypsum (3-5%) for setting control.
7. Packaging & Distribution – The finished cement is packed into 50 kg bags or bulk transport containers.
Why the Dry Process is Better?
Energy-efficient (no water evaporation loss)
Faster production process
Better quality control
4. Raw Materials Used in Cement & Their Properties
Cement is made using calcareous (lime-based) and argillaceous (clay-based) materials. The main raw materials include:
Limestone (CaCO₃) – Provides lime (CaO), essential for cement strength.
Clay/Shale – Provides silica (SiO₂) and alumina (Al₂O₃) for durability.
Iron Ore – Contains iron oxide (Fe₂O₃) for clinker formation and cement color.
Gypsum (CaSO₄·2H₂O) – Regulates setting time.
Fly Ash (for PPC Cement) – Enhances workability and reduces heat generation.
5. Chemical Composition of Cement
Cement consists of four major compounds that affect its strength and setting properties:
1. Tricalcium Silicate (C₃S) – Provides early strength (1-7 days). Reacts quickly with water. Makes up 40-50% of cement.
2. Dicalcium Silicate (C₂S) – Provides long-term strength (after 28 days). Reacts slowly. Makes up 20-25% of cement.
3. Tricalcium Aluminate (C₃A) – Influences initial setting time and heat generation. It is responsible for sulfate attack. Makes up 5-10% of cement.
4. Tetracalcium Aluminoferrite (C₄AF) – Affects cement color and sulfate resistance. Plays a minor role in strength development. Makes up 5-15% of cement.
Other minor compounds include:
Magnesium Oxide (MgO) – Should be below 5% to prevent cracks.
Sulfur Trioxide (SO₃) – Controls setting time but excess can cause cracks.
Alkalies (Na₂O, K₂O) – Can cause efflorescence (white patches).
6. Hydration of Cement
When cement is mixed with water, a chemical reaction called hydration occurs. The major reactions include:
C₃S + H₂O → Strength Gain (Early Stage)
C₂S + H₂O → Strength Gain (Long-Term)
C₃A + H₂O → Heat Generation & Initial Set
7. Properties of Cement
The key properties of cement include:
1. Fineness – Determines how quickly it reacts with water.
2. Soundness – Ensures no expansion or cracks in hardened cement.
3. Setting Time – Measured as initial (30 mins) and final (10 hours).
4. Strength – Includes compressive strength, tensile strength, and flexural strength.
5. Heat of Hydration – The heat released during setting affects durability.
6. Bulk Density – Ranges from 1100 to 1300 kg/m³.
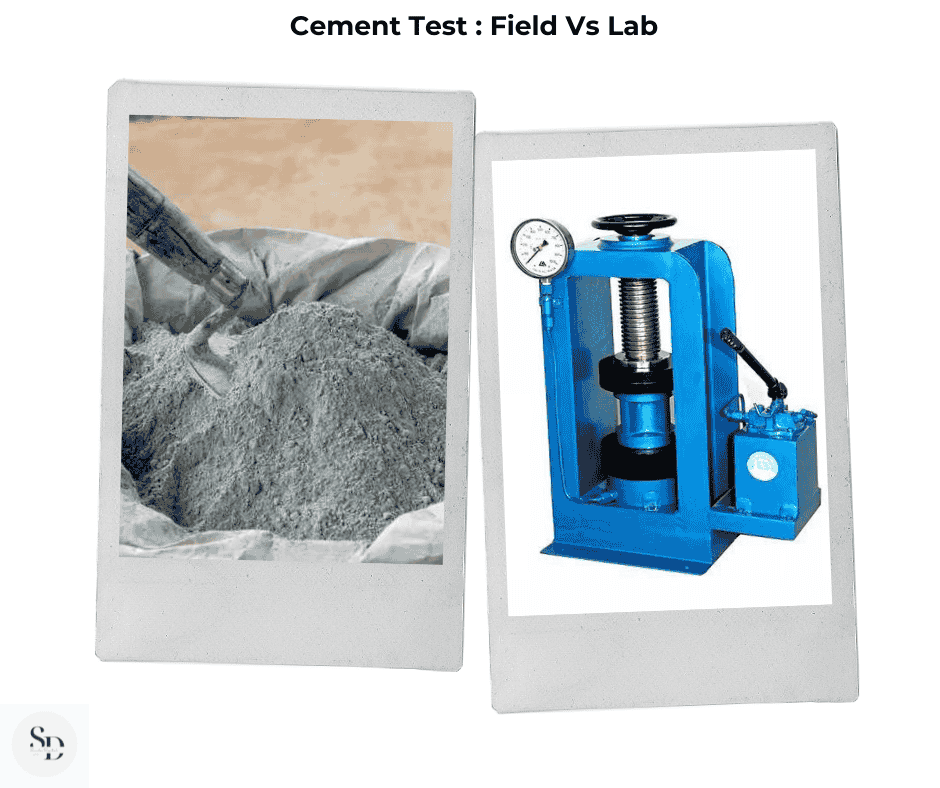
Cement Test : Field Tests vs. Laboratory Tests
Field Tests of Cement
1. Color Test
2. Touch and Feel Test
3. Smell Test
4. Temperature Test
5. Lump Test
6. Float Test
7. Hand Insertion Test
8. Water Reaction Test
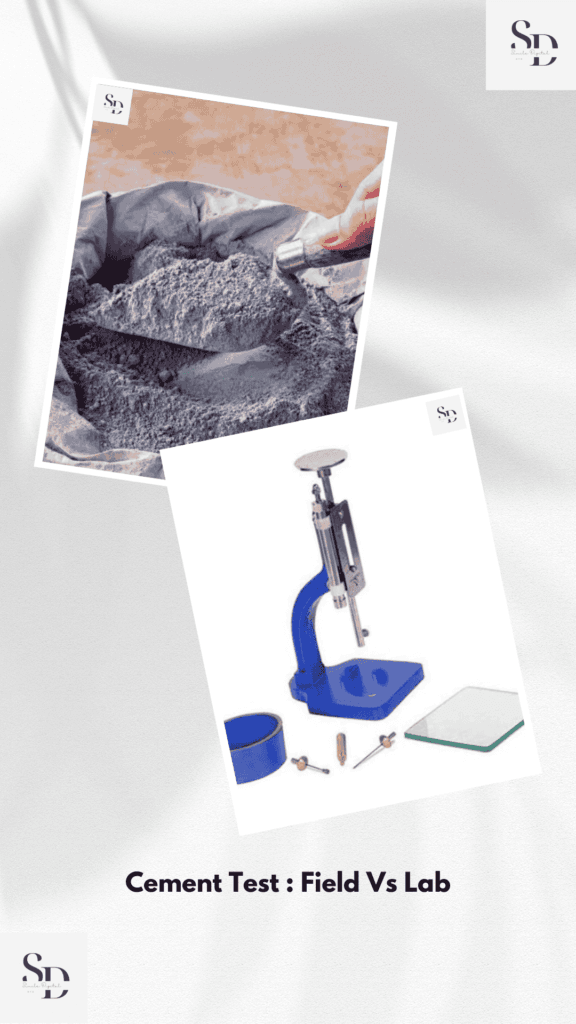
Laboratory Tests of Cement
1. Fineness Test
2. Consistency Test
3. Setting Time Test
4. Soundness Test
5. Compressive Strength Test
6. Heat of Hydration Test
7. Tensile Strength Test
8. Loss on Ignition Test
9. Specific Gravity Test
10. Chemical Composition Test
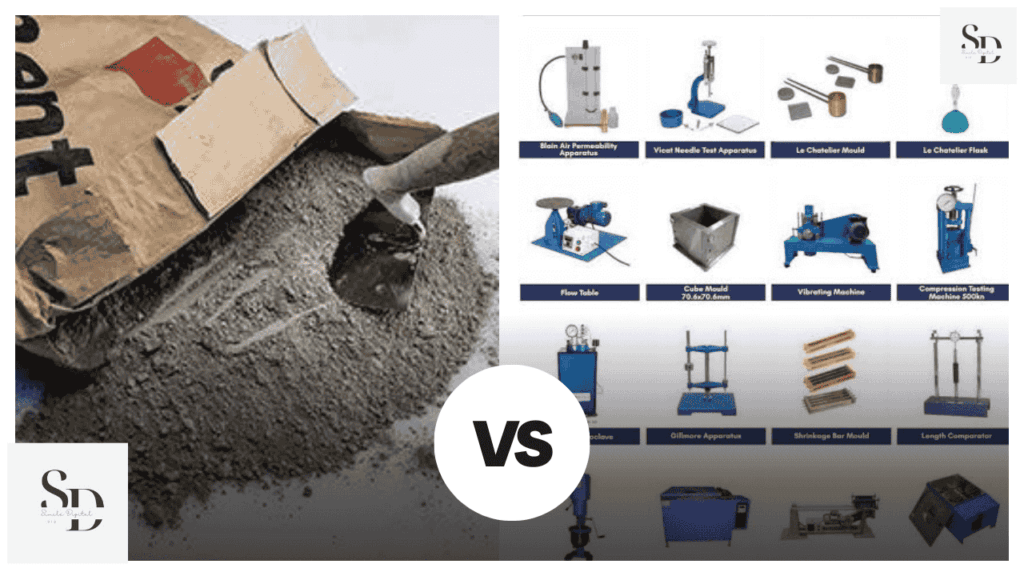
Field Tests of Cement
Field tests of cement are quick and easy methods used at the construction site to check cement quality before detailed laboratory analysis. These tests help in identifying any major defects in cement that could affect the strength of a structure. Here’s a detailed explanation of each field test:
1. Color Test
Purpose: To check the quality and freshness of cement.
Procedure:
Take a small quantity of cement and observe its color.
Good quality cement should be uniform grayish-green in color.
Any dull or inconsistent color may indicate impurities or poor quality.
Observation:
A grayish-green color indicates fresh and good-quality cement.
If the cement appears dull or brownish, it may contain excess clay or other impurities.
2. Touch and Feel Test
Purpose: To check the smoothness and fineness of cement.
Procedure:
Take a pinch of cement between your fingers and rub it.
Good quality cement should feel smooth and soft to the touch.
Observation:
If the cement feels rough or gritty, it may contain sand or other impurities.
A smooth texture indicates properly ground cement.
3. Smell Test
Purpose: To detect the presence of excessive lime or clay in cement.
Procedure:
Take a small quantity of cement and smell it.
Observation:
Good quality cement should not have any earthy or clay-like odor.
If a muddy or earthy smell is present, it indicates that the cement contains an excessive amount of clay and is not suitable for construction.
4. Temperature Test
Purpose: To check the heat generated by cement due to hydration.
Procedure:
Insert your hand into a bag of cement.
Observation:
Good quality cement should feel cool to the touch.
If the cement bag feels warm or hot, it may be undergoing a hydration reaction, indicating that it has absorbed moisture and may not be suitable for use.
5. Lump Test
Purpose: To check if cement has absorbed moisture.
Procedure:
Open a bag of cement and check for lumps.
Observation:
Good quality cement should be free from lumps.
If hard lumps are present, it means that the cement has absorbed moisture and may have lost its strength.
6. Float Test
Purpose: To check the fineness and density of cement.
Procedure:
Take a small pinch of cement and throw it in a bowl of water.
Observation:
Good quality cement should float for some time before sinking.
If the cement sinks immediately, it may be too coarse and of low quality.
7. Hand Insertion Test
Purpose: To check the heat generation due to hydration.
Procedure:
Insert your hand into a heap of dry cement.
Observation:
If the cement is of good quality, it should feel cool to the touch.
If the cement heap feels warm, it indicates an initial hydration reaction due to moisture absorption.
8. Water Reaction Test
Purpose: To check how cement reacts with water.
Procedure:
Take a handful of cement and mix it with water to form a paste.
Apply this paste to a glass plate or smooth surface.
Observation:
Good quality cement should form a paste that remains smooth and uniform.
If cracks appear within a few minutes, it may indicate the presence of excess impurities or poor quality cement.
Laboratory Tests of Cement
Laboratory tests of cement provide precise and accurate data on its physical and chemical properties. These tests follow Indian Standard (IS) codes and are conducted using specialized equipment in controlled conditions. Below are the most important laboratory tests of cement, along with the required apparatus and detailed procedures.
1. Fineness Test of Cement
Purpose: To check the particle size of cement and ensure proper hydration for strength development.
Apparatus Required:
90-micron IS sieve
Weighing balance
Brush
Sieve shaker
Procedure:
1. Weigh 100g of cement and place it in the 90-micron sieve.
2. Shake the sieve for 15 minutes using a sieve shaker.
3. Weigh the cement retained on the sieve.
Observation & Result:
As per IS 4031 (Part 1): 1996, not more than 10% of the cement should be retained on the sieve.
2. Standard Consistency Test
Purpose: To determine the percentage of water required to produce a standard consistency cement paste.
Apparatus Required:
Vicat apparatus
Weighing balance
Measuring cylinder
Glass plate
Trowel
Procedure:
1. Take 400g of cement and mix it with water in a tray.
2. Add water (usually 25-35% of cement weight) and mix thoroughly.
3. Fill the Vicat mould with the cement paste.
4. Lower the Vicat plunger gently until it touches the paste surface.
5. Release the plunger and note the penetration depth.
Observation & Result:
As per IS 4031 (Part 4): 1988, the plunger should penetrate 5-7 mm from the bottom of the mould.
3. Setting Time Test
Purpose: To determine the initial and final setting time of cement.
Apparatus Required:
Vicat apparatus
Stopwatch
Glass plate
Needle (1mm for initial setting, 5mm for final setting)
Procedure:
1. Prepare a cement paste with standard consistency.
2. Insert the 1mm needle at regular time intervals to check penetration.
3. When the needle does not penetrate beyond 5mm, note the time as initial setting time.
4. For the final setting time, use a 5mm needle and check until it no longer makes an impression on the paste.
Observation & Result:
Initial setting time should be 30 minutes (min).
Final setting time should be not more than 600 minutes (max) as per IS 4031 (Part 5): 1988.
4. Soundness Test
Purpose: To check the volumetric stability of cement and ensure it does not expand after setting.
Apparatus Required:
Le Chatelier apparatus
Water bath
Weighing balance
Procedure:
1. Prepare a cement paste and fill the Le Chatelier mould.
2. Place the mould in a water bath at 27°C for 24 hours.
3. Measure the expansion of the mould after cooling.
Observation & Result:
As per IS 4031 (Part 3): 1988, expansion should not exceed 10 mm for ordinary cement.
5. Compressive Strength Test
Purpose: To determine the strength of cement after setting.
Apparatus Required:
Compressive testing machine (CTM)
Moulds (70.6mm x 70.6mm x 70.6mm)
Weighing balance
Trowel
Water
Procedure:
1. Prepare a cement mortar mix (1 part cement: 3 parts standard sand).
2. Fill the moulds and cure for 24 hours in moist air.
3. Remove the cubes and cure in water for 7 and 28 days.
4. Test the cubes in the CTM machine by applying load until failure.
Observation & Result:
As per IS 4031 (Part 6): 1988, minimum strength should be 16 MPa (7 days) and 33 MPa (28 days).
6. Heat of Hydration Test
Purpose: To determine the heat generated when cement reacts with water.
Apparatus Required:
Calorimeter
Weighing balance
Thermometer
Procedure:
1. Mix 500g of cement with water in a calorimeter.
2. Record the temperature at regular intervals.
Observation & Result:
Low heat cement should generate less than 65 cal/g at 7 days as per IS 4031.
7. Tensile Strength Test
Purpose: To determine the tensile strength of cement.
Apparatus Required:
Briquette moulds
Tensile testing machine
Weighing balance
Trowel
Procedure:
1. Prepare a cement-sand mix (1:3) and fill the moulds.
2. Cure in water for 7 days.
3. Place the mould in the tensile testing machine and apply load.
Observation & Result:
As per IS 4031 (Part 8): 1988, tensile strength should be 2 MPa (7 days).
8. Loss on Ignition Test
Purpose: To measure the amount of volatile substances in cement.
Apparatus Required:
Furnace
Crucible
Weighing balance
Procedure:
1. Weigh a sample of cement and heat it at 900-1000°C for 15 minutes.
2. Measure the weight loss.
Observation & Result:
As per IS 4031 (Part 11): 1988, loss should be less than 4%.
9. Specific Gravity Test
Purpose: To determine the density of cement.
Apparatus Required:
Le Chatelier flask
Kerosene
Weighing balance
Procedure:
1. Fill the flask with kerosene and note the reading.
2. Add cement and record the displacement.
Observation & Result:
As per IS 4031 (Part 11): 1988, specific gravity should be 3.1-3.15.
10. Chemical Composition Test
Purpose: To check the chemical properties of cement.
Apparatus Required:
Spectrometer
Chemical reagents
Procedure:
1. A sample of cement is tested for lime, silica, alumina, iron oxide, and magnesia.
Observation & Result:
Cement should contain 62-67% lime, 17-25% silica, 3-8% alumina, as per IS 269.
Storage of Cement at Site
Proper storage of cement at a construction site is crucial to maintain its quality and strength. Exposure to moisture, air, or contamination can make cement unusable.
1. General Storage Guidelines:
Cement bags should be stored in a dry, moisture-free, and ventilated area.
Bags should be stacked on wooden planks or pallets, at least 150 mm (6 inches) above the ground.
Keep cement bags at least 300 mm (12 inches) away from walls to prevent moisture absorption.
Maximum stacking height should not exceed 10 bags to prevent lumps from forming.
Use older cement first (First In, First Out method).
Do not store cement for a long period, as it starts losing strength.
2. Minimum Shelf Life of Cement
The minimum shelf life of cement depends on storage conditions and type.
Ordinary Portland Cement (OPC): 3 months under proper storage conditions.
Portland Pozzolana Cement (PPC): 4-6 months if stored properly.
If stored beyond these periods, cement strength reduces by 10%-20% over time.
Re-test cement if used after 3 months to ensure it meets IS strength requirements.
Physical Properties of Cement
1. Density of Cement
The density of cement is 1440 kg/m³ (or 1.14 g/cm³).
Bulk density (including air spaces) ranges from 1100 to 1350 kg/m³.
2. Specific Gravity of Cement
The specific gravity of cement is 3.15, meaning it is 3.15 times heavier than water.
Specific gravity is measured using the Le Chatelier Flask or Pycnometer Method.
3. Weight of Cement
1 bag of cement = 50 kg.
1 cubic meter of cement = 1440 kg (approximate bulk density).
4. Fineness of Cement
Fineness affects hydration rate and strength.
IS 4031 recommends that cement should have less than 10% retained on a 90-micron sieve.
5. Setting Time of Cement
Initial Setting Time – 30 minutes (minimum, as per IS 269).
Final Setting Time – 600 minutes (10 hours) (maximum).
6. Compressive Strength of Cement
Measured on mortar cubes (1:3 ratio of cement & sand).
3-day strength: 16 MPa (OPC 33 grade)
7-day strength: 22 MPa (OPC 33 grade)
28-day strength: 33 MPa (for OPC 33), 43 MPa (for OPC 43), 53 MPa (for OPC 53)
7. Soundness of Cement
Ensures no expansion or cracks in hardened cement.
Le Chatelier Apparatus is used to test it.
8. Heat of Hydration
Depends on C₃A content. High C₃A = more heat release.
Important in mass concrete structures like dams.
9. Workability of Cement
Determines ease of mixing and placing.
Improved by adding plasticizers.
Books
1. Concrete Technology: Theory and Practice – M.S. Shetty
2. Concrete Technology – M.L. Gambhir
3. Cement Manufacturer’s Handbook – Kurt E. Peray
4. Properties of Concrete – A.M. Neville
5. Cement Data Book – Walter H. Duda
Conclusion
Cement testing plays a crucial role in ensuring the quality, strength, and durability of construction projects. While field tests provide a quick, on-site assessment of cement quality, they are not sufficient for structural reliability. Laboratory tests, on the other hand, offer detailed, precise results based on scientific standards and IS codes.
Key Takeaways:
1. Field Tests such as color, feel, smell, lump, and temperature tests help identify impurities and moisture absorption in cement.
2. Laboratory Tests provide accurate data on fineness, consistency, setting time, strength, and chemical composition.
3. Field tests are quick and cost-effective but lack accuracy, whereas laboratory tests ensure compliance with IS standards.
4. Testing ensures that cement will provide the required strength and durability for safe construction.
5. Proper cement testing prevents structural failures, reduces construction defects, and enhances the longevity of buildings, bridges, and roads.
Both field and laboratory tests should be used together to ensure cement is fit for construction. Engineers should rely on laboratory tests before finalizing any cement batch to ensure safety, strength, and performance in real-world conditions.
Thank You Note
Thank you for reading our detailed guide on Cement Field Tests vs. Laboratory Tests. We hope this article helps you understand the importance of cement quality testing and how it impacts construction safety and durability. Whether you’re a civil engineer, contractor, or student, these tests will guide you in choosing the best quality cement for your projects.
For more comparisons and insights, visit our blog regularly. If you have any questions or suggestions, feel free to leave a comment or contact us directly. Happy building!
Frequently Asked Questions (FAQs)
Why are field tests of cement important?
Which field test is the most reliable for checking cement quality?
What is the difference between initial and final setting time of cement?
Final setting time is the time when cement completely hardens and gains strength (not more than 600 minutes).
How can we check if cement has expired?
Why is the fineness test of cement important?
What is the significance of the soundness test of cement?
What is the minimum strength of cement required as per IS code?
Compressive strength should be at least 16 MPa (7 days) and 33 MPa (28 days).
Tensile strength should be at least 2 MPa (7 days).
Note for Readers
If you’d like to read this blog in your regional language or any other international language, simply click on the Google Translator option located in the bar at the top of the page. This feature allows you to select your preferred language and enjoy the content in a way that’s comfortable for you. We hope this makes your reading experience more enjoyable and accessible!
Disclaimer
The information provided in this article is based on Indian Standard (IS) codes and general construction practices. While field tests provide a basic assessment of cement quality, they should not replace laboratory testing for critical projects. It is recommended to consult a professional engineer or testing laboratory before using cement for large-scale construction work.
We do not take responsibility for any damage or construction failures resulting from the sole reliance on field tests without proper lab verification. Always follow IS code guidelines and safety standards when selecting and using cement.
For more exciting topics, explore our other articles here
5 Comments